Wishlist Module
The J2Commerce - Wishlist module (mod_j2commerce_wishlist) displays a heart icon alongside the current shopper's wishlist item count and a link to the wishlist page. Place it in your navbar, header, or any module position to give shoppers one-click access to their saved products.
This module is a companion to the app_wishlist plugin. The plugin must be installed and enabled before this module will display a meaningful count.
Prerequisites
- J2Commerce 6 is installed and active.
- The app_wishlist add-on plugin is installed and enabled. See the Wishlist app guide for setup instructions.
- At least one menu item is linked to the wishlist page (recommended for correct URL generation).
Purchase and Download
The Wishlist Module is a premium add-on available from the J2Commerce extension directory.
Step 1: Go to our J2Commerce website -> Modules
Step 2: Locate the Wishlist Module -> click View Details -> Add to cart -> Checkout.
Step 3: Go to your My Downloads under your profile button at the top right corner and search for the app. Click Available Versions -> View Files -> Download
Install the Module
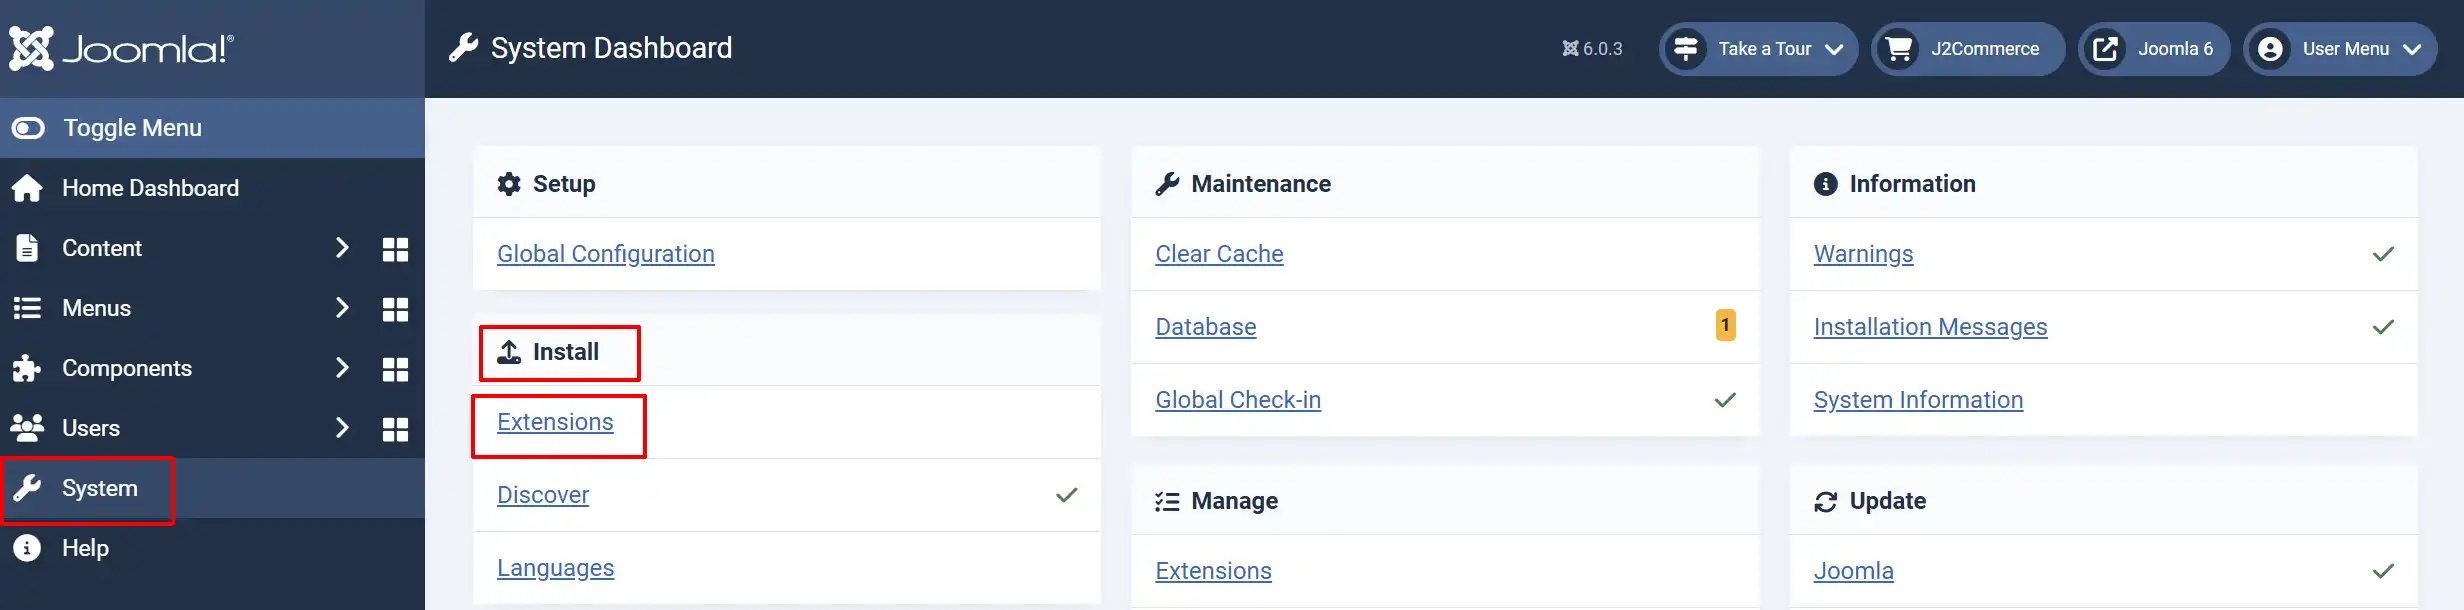
In the Joomla Administrator, go to System -> Install -> Extensions.
Upload the mod_j2commerce_wishlist.zip package ZIP file or use the Install from URL option.
Enable the Module
Once you have installed the module, you will need to enable it. Go to the Content icon in the left sidebar -> Site Modules
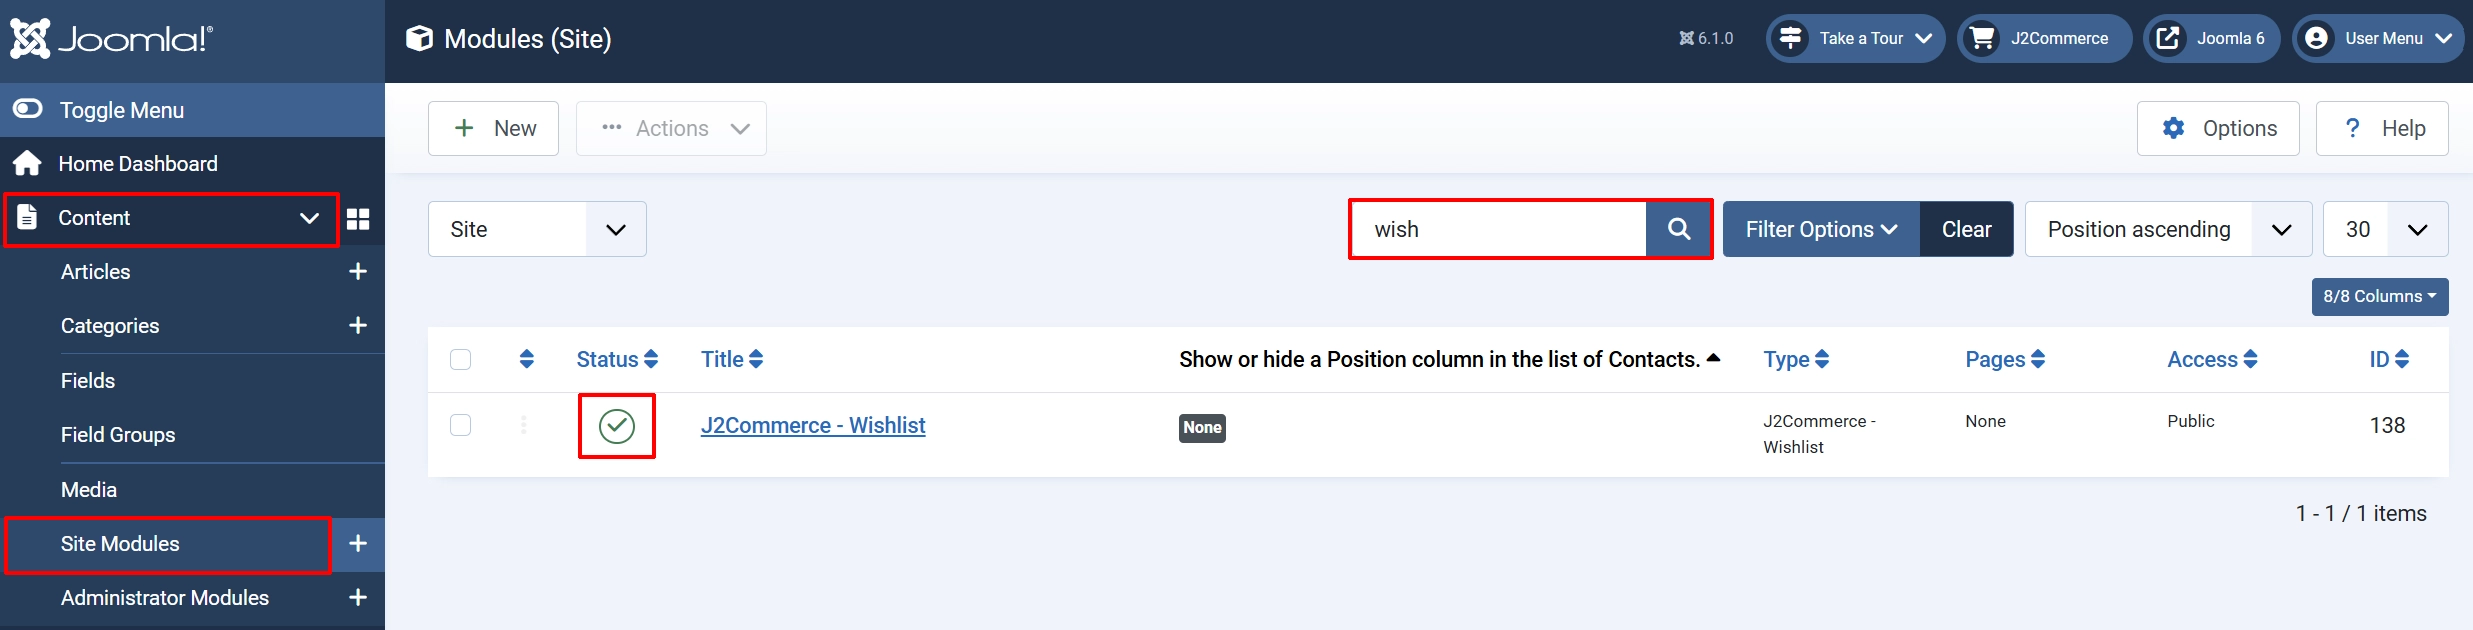
Search for Wishlist, click the X, and it will turn into a green checkmark. It is now enabled and ready for setup.
Configure the Module
Once you click on the Wishlist Title next to the green checkmark, you are ready to start setting up the parameters.
Tip: Click on the Toggle Inline Help button on any app/plugin you install and it will show a description below each section.
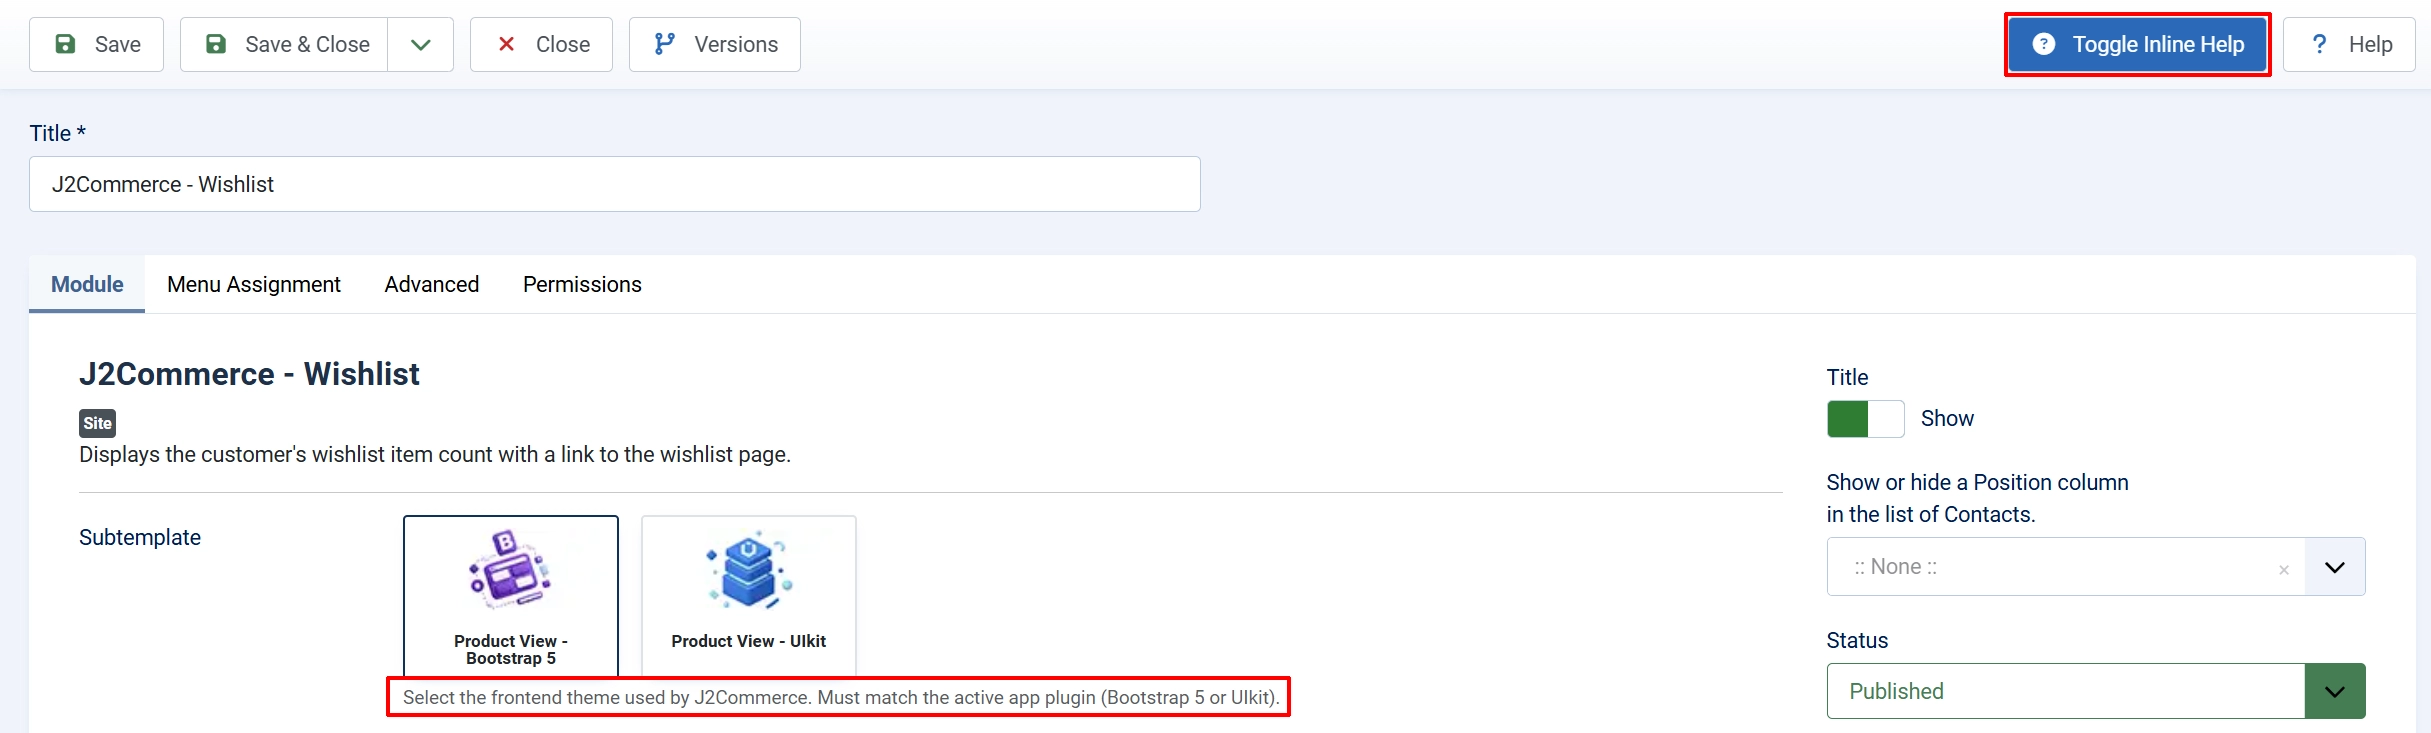
Basic Settings tab
Assign the module to a Position (e.g., menu, header, or your template's top-right position).
Assign it to the pages where it should appear under the Wishlist Menu Assignment tab.
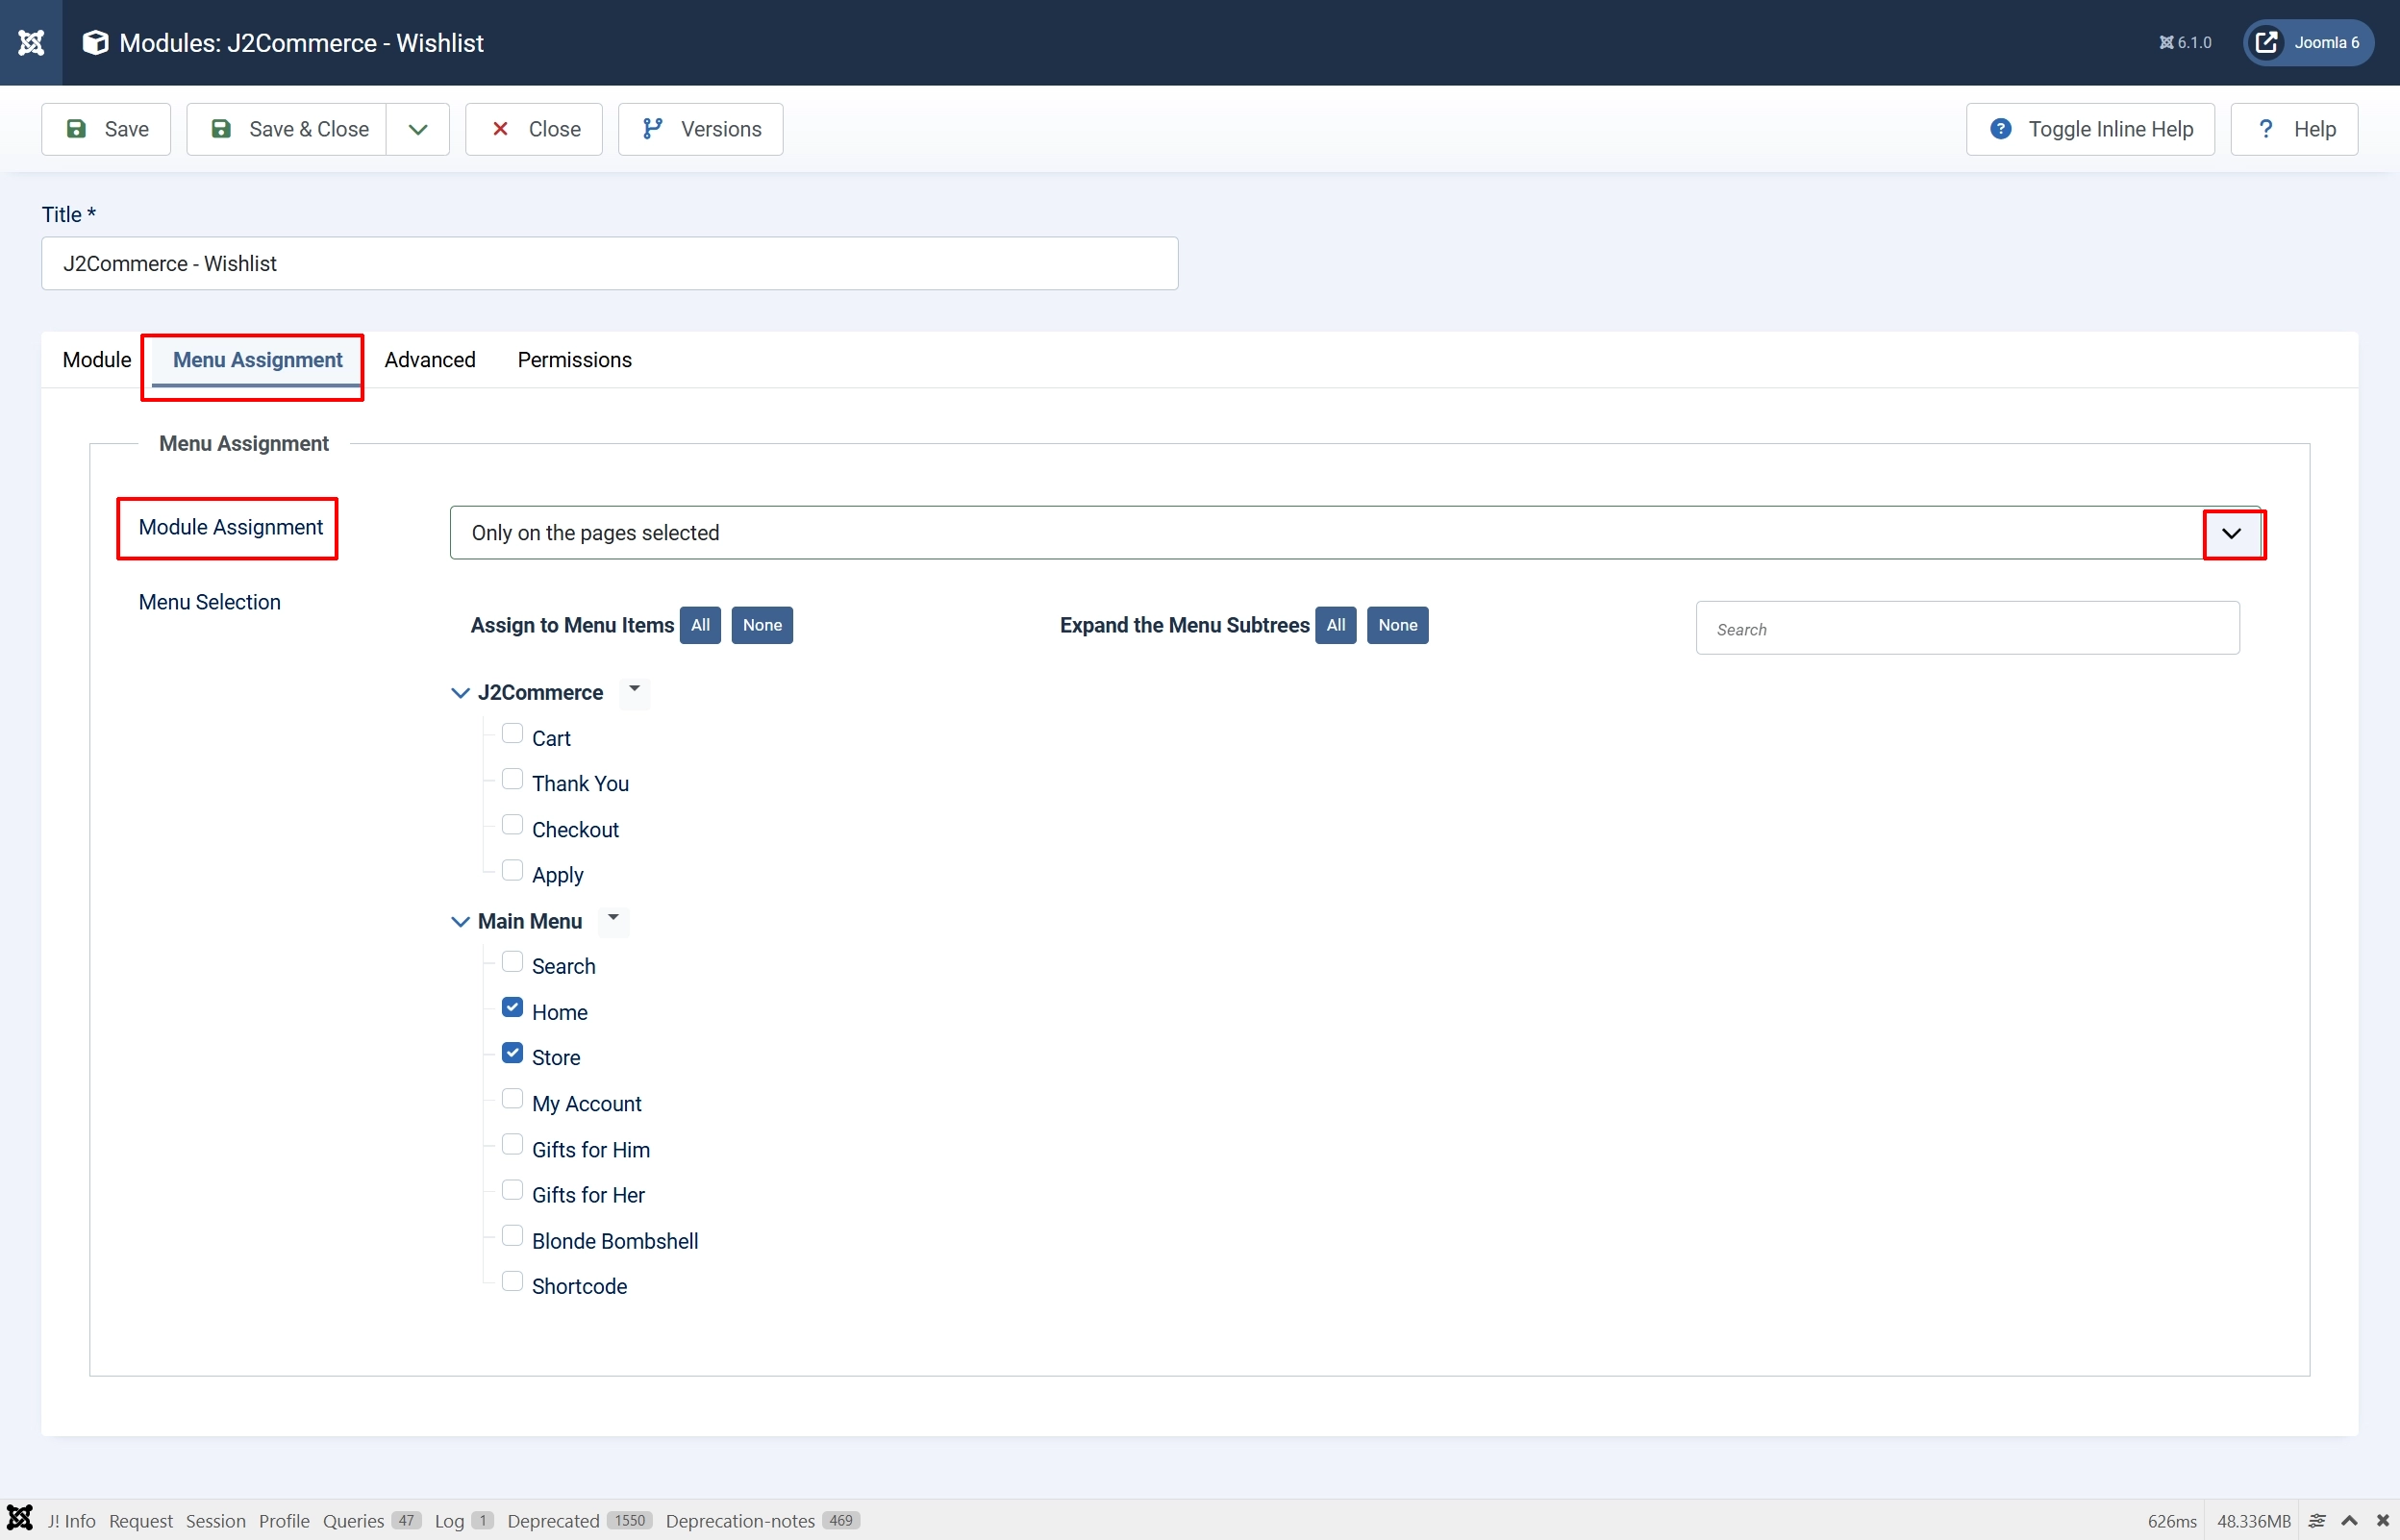
Click Save & Close.
Configuration Options
All settings are on the Module tab when editing the module.
Display type: Show the wishlist link as a plain link or a Bootstrap 5 button.
-
Link renders a plain
<a>tag that inherits your template's link styles. The badge count appears next to a heart icon, and a text label shows the item count or the word "Wishlist" when empty. -
Button renders an
<a>tag styled as a Bootstrap 5btn btn-outline-secondary. Only the heart icon and badge count are shown — no text label — making it compact for tight spaces like navbars.
Hide when empty: When enabled, the entire module is hidden if the wishlist contains zero items.
Wishlist menu item: Manually select the menu item for the wishlist page. Leave empty to auto-detect.
When left empty, the module scans your site's menu for an item whose query matches view=products&task=wishlist and uses that item's ID to build a SEF URL. This is the same auto-detection logic used by the app_wishlist plugin itself.
If your site has multiple menu items pointing at the wishlist page, or if auto-detection is not working, use this field to pin the module to a specific menu item. Select the menu item from the dropdown.
Placement Tips
- Navbar / header — Use the Button display type for a compact icon-plus-badge appearance that matches a cart icon.
- Sidebar — Use the Link display type with Hide when empty enabled so the sidebar doesn't show an empty entry.
- After-add confirmation area — Keep Hide when empty disabled so the module appears immediately after a shopper saves their first item.
Live Count Refresh
The module automatically refreshes the displayed count without a page reload when the j2commerce:wishlist:updated custom DOM event fires. This event is dispatched by the app_wishlist plugin whenever a product is added to or removed from the wishlist.
No extra configuration is required — the JavaScript is output inline with the module and listens for the event on the document.
Troubleshooting
The module shows a count of zero even after adding items to the wishlist
Cause: The app_wishlist plugin is not installed or not enabled, so no items are being saved to the wishlist table.
Solution:
- Go to System -> Manage -> Extensions.
- Search for app_wishlist.
- If it is not in the list, install it first.
- If it is installed but disabled, click the checkbox and click Enable.
- Reload the frontend and add a product to the wishlist.
The wishlist link points to the wrong page or returns a 404
Cause: No menu item exists with the wishlist view assigned, or the wrong menu item was auto-detected.
Solution:
- Create a menu item of type J2Commerce -> Wishlist if one does not exist.
- Open the module settings in Content -> Site Modules.
- Set the Wishlist menu item field to the correct menu item.
- Save and reload the frontend.
The count does not refresh after adding a product
Cause: The j2commerce:wishlist:updated event is not being dispatched by the theme or the app_wishlist plugin's JavaScript is not loaded.
Solution:
- Check that the app_wishlist plugin is enabled and its JavaScript file loads on the product page (look for
wishlist.jsin the browser network panel). - If you have a custom template that suppresses JavaScript, ensure the
<head>includes deferred scripts. - If the event is dispatched under a different name in a customised build, update the listener in a template override of
tmpl/default.php.